Felt the cold this winter? Home unbearably hot in summer? Chances are your house is under insulated. Without adequate insulation, you could be losing or gaining as much as 25% of your home’s heat! Unfortunately, many Australian households are in the same boat, experiencing uncomfortable indoor temperatures year round and paying more on their electricity bills than they should be.
If you suspect your wall insulation is missing or not performing like it should, it’s time to think about installing new insulation.
Why Should I Replace My Wall Insulation?
Home insulation is hands down the best way to passively regulate temperatures inside your home, use less electricity, save money on your power bill and have a more environmentally friendly lifestyle. If you live in an older home, or it’s been over 10 years since your insulation was installed, it’s worth getting it checked out. Wall insulation is manufactured to last for decades, but damage, mould or rodents can decrease its lifespan. Over time compression, moisture or movement can create gaps in the insulation, decreasing its R-Value or insulating power.
How do I Retrofit Wall Insulation?
If you’re new to the world of insulation, it can seem like an overwhelming mess of product types, technical words and differing opinions. Below we break it all down into five easy steps for retrofitting wall insulation. For more information, check out this comprehensive insulation questions FAQ.
- Time it Right
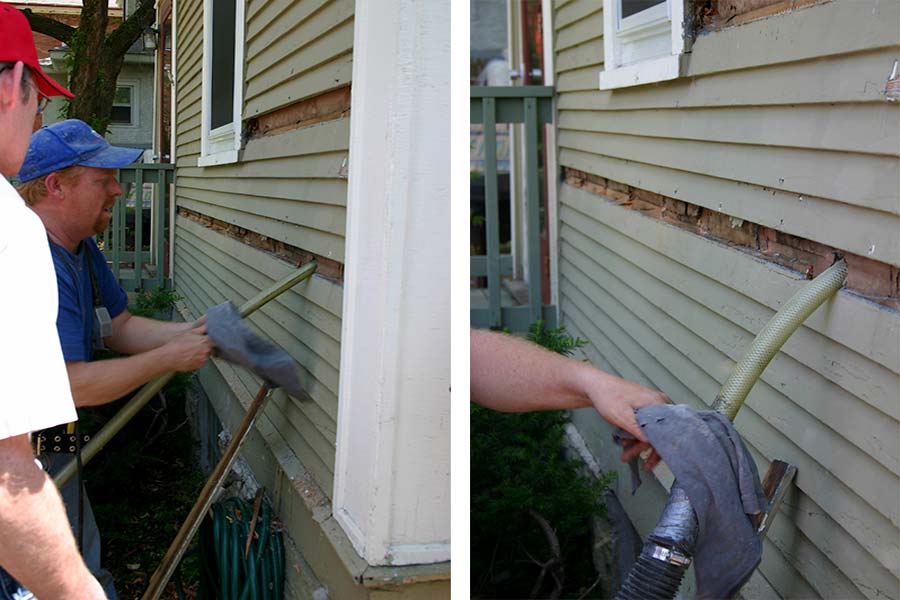
The best time to retrofit insulation in an existing home is during a major renovation or extension. That’s because the wall cavities will be exposed, giving you easy access to install the insulation. If the wall cavity is not going to be exposed, you may consider blown-in insulation options. In the next step, we’ll cover the pros and cons of this type of insulation.
- Choose the Best Type of Insulation
There are several types of insulation that can be used for retrofit wall applications. Two of the most popular are insulation batts and blown-in cellulose insulation.
Insulation Batts – These are a type of bulk insulation which are pre-cut to fit in between the wall joists of most Australian homes. They are most commonly made of glasswool (recycled glass materials), polyester (recycled plastic materials) and rockwool (crushed rock materials). They tend to be inexpensive, effective and long lasting. Most have a high fire rating too. Specialised acoustic batts offer acoustic benefits to keep your home quieter. Insulation batts can be installed as a DIY project or by a professional.
Blown-In Cellulose – Blown-in cellulose insulation is installed directly into the wall cavity using a specialised blowing machine. This means the wall cavity does not have to be completely exposed and the insulation can fill hard to reach or awkwardly shaped spaces.
Cellulose blown-in insulation is made from treated ground up paper materials and as a result has a lower fire rating than insulation batts. It is quite effective for the first few years, but over time the particles can settle, creating an air gap at the top of the wall cavity. This air gap becomes a problem, letting warmth escape in winter and letting heat creep in during summer.
If you are planning a major renovation, it is worth investing in insulation batts over blown-in cellulose as batts will provide superior performance for longer.
- DIY or Hire a Professional
Cellulose blown-in insulation is usually installed by a professional as it requires specialised equipment. Insulation batts can be installed by a professional or you can install them yourself. DIY will save you installation costs, but it’s important that you install the batts correctly for maximum performance.
Insulation batts are pressed between the wall joists and can be strapped into place. During installation, the batts should not be compressed or folded and no gaps should be left between them. These issues can all compromise the insulation power of the batts.
The batts should be shaped and fit behind any plumbing work and ventilation should be kept uncovered. If required, batts are easy to trim down into an appropriate size. When cutting batts, a good rule of thumb is to oversize the cut by 10mm to ensure you have a snug fit. Any off cuts can be used to fill gaps around windows and doors.
- Safety Tips
If you are installing insulation yourself, make sure you research and follow good safety practices. It is highly recommended to wear safety glasses, a dust mask, long sleeves and gloves. Some glasswool products may cause irritation or itchiness to the skin through prolonged contact.
- Enjoy the Benefits of Your New Insulation!
Once the job is all done, you’ll start feeling the difference straight away. Wall insulation will make a tangible effect on the temperatures inside your home. No more unbearably chilly winters and overwhelmingly hot summers! Typically, your power bill savings will pay back the cost of the insulation in under two years.


Comments